
Scan to Mail configuration using Office365 Relay on Sharp MFP Printer
Description
This article describes how to configure a Sharp Multi-Fonction Printer to scan documents and send it to internal emails.
Applies to
- Tested on Sharp MX-3140N
- Office365 SMTP Relay
Configuration
Go to the Printer Administration Panel and login as Administrator (Top Right corner. Default password should be admin)
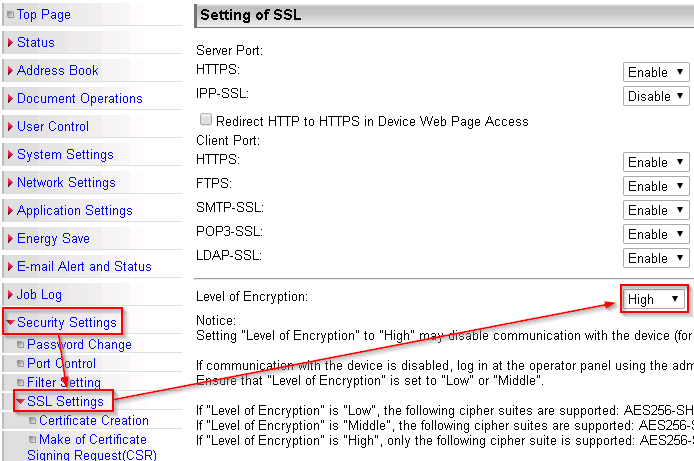
Go to Security Settings -> SSL Settings and change the Level of Encryption to High.
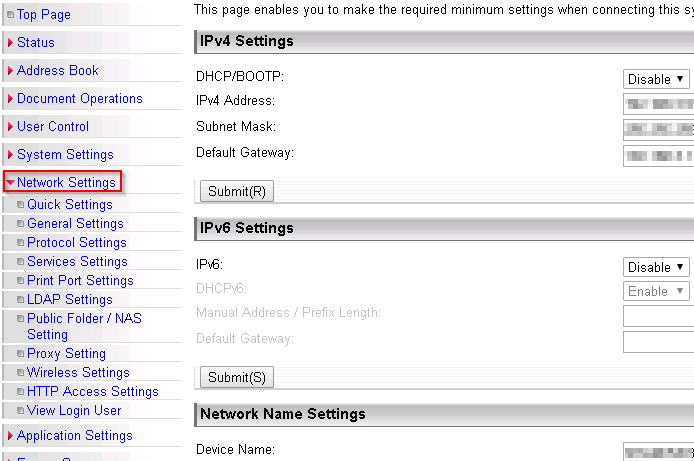
Go to Network Settings and scroll down the page to the SMTP Settings
Enter the primary MX server associated with your Office365 account (see instructions below), an address that exists in your Office365 account and check the Enable SSL checkbox.
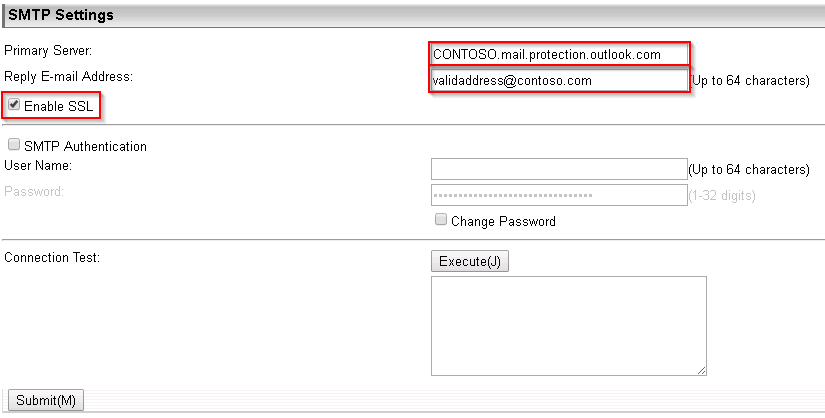
You can hit the submit button to validate your settings. Then come back there and test them.
Find you SMTP Primary Server Address
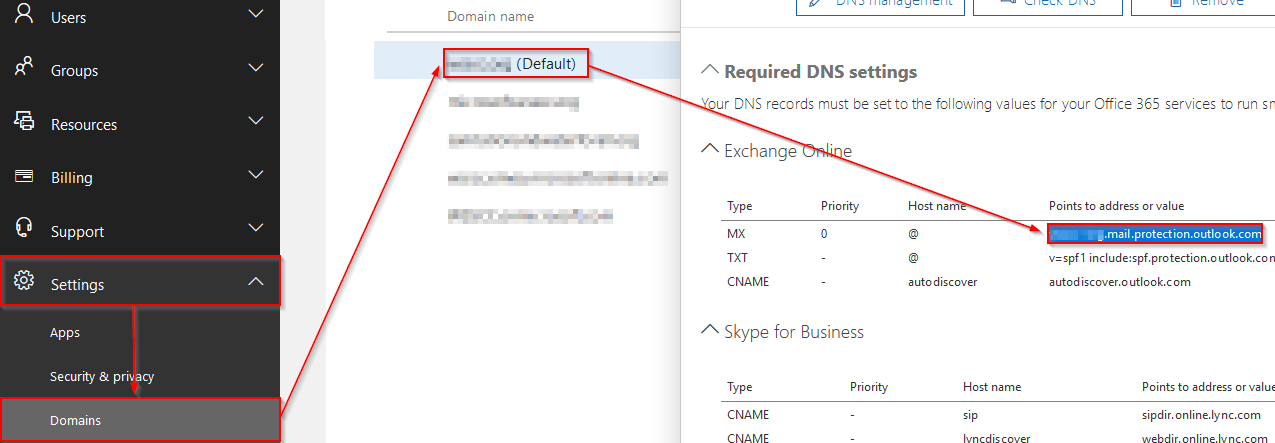
Open a web browser, log into your Office365 account and go to Settings -> Domains
Click on your domain DNS entries to get the information about it and copy the MX address value.
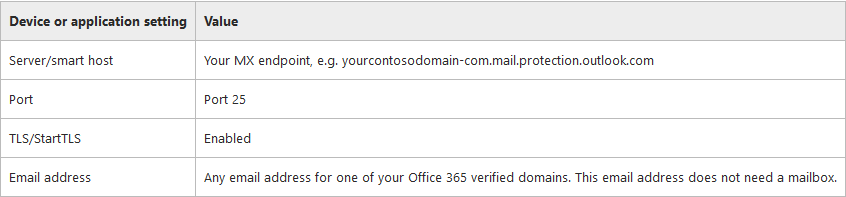
In case you wonder, these are the settings Microsoft requires you to enter when configuring the relay.
Sources
https://technet.microsoft.com/en-us/library/dn554323(v=exchg.150).aspx
http://www.kb.lesolson.com/InstantKB20/KnowledgebaseArticle50524.aspx